 Solidus
Getting started
Create your first wallet
Creating a wallet takes a minute. All you need is a name; you can leave the rest as it is and change it later.
In short
- A wallet needs a name and a currency.
- The currency belongs to that wallet; each wallet can have its own.
- The icon and colour are just to recognise it at a glance.
- Wallets imported from a file are created in the same step.
Before you start
How many wallets do I need?
As many as help you see your money clearly. One per broker or one per goal (retirement, savings, kids) is the most common. You can always move a position to another wallet.
1Open “New wallet”
In “Wallets”, press “New wallet”. On your first visit the app offers it right on the home screen.
2Fill in the basics
Type a name you will recognise (“EU Stocks”, “Crypto”, “Funds”…) and pick the currency. If the wallet belongs to someone else in your family, mark it under “Owner”.
If your broker holds idle cash between trades, turn on “This account holds cash”: buying spends the balance and selling refills it, and you can record deposits and withdrawals.
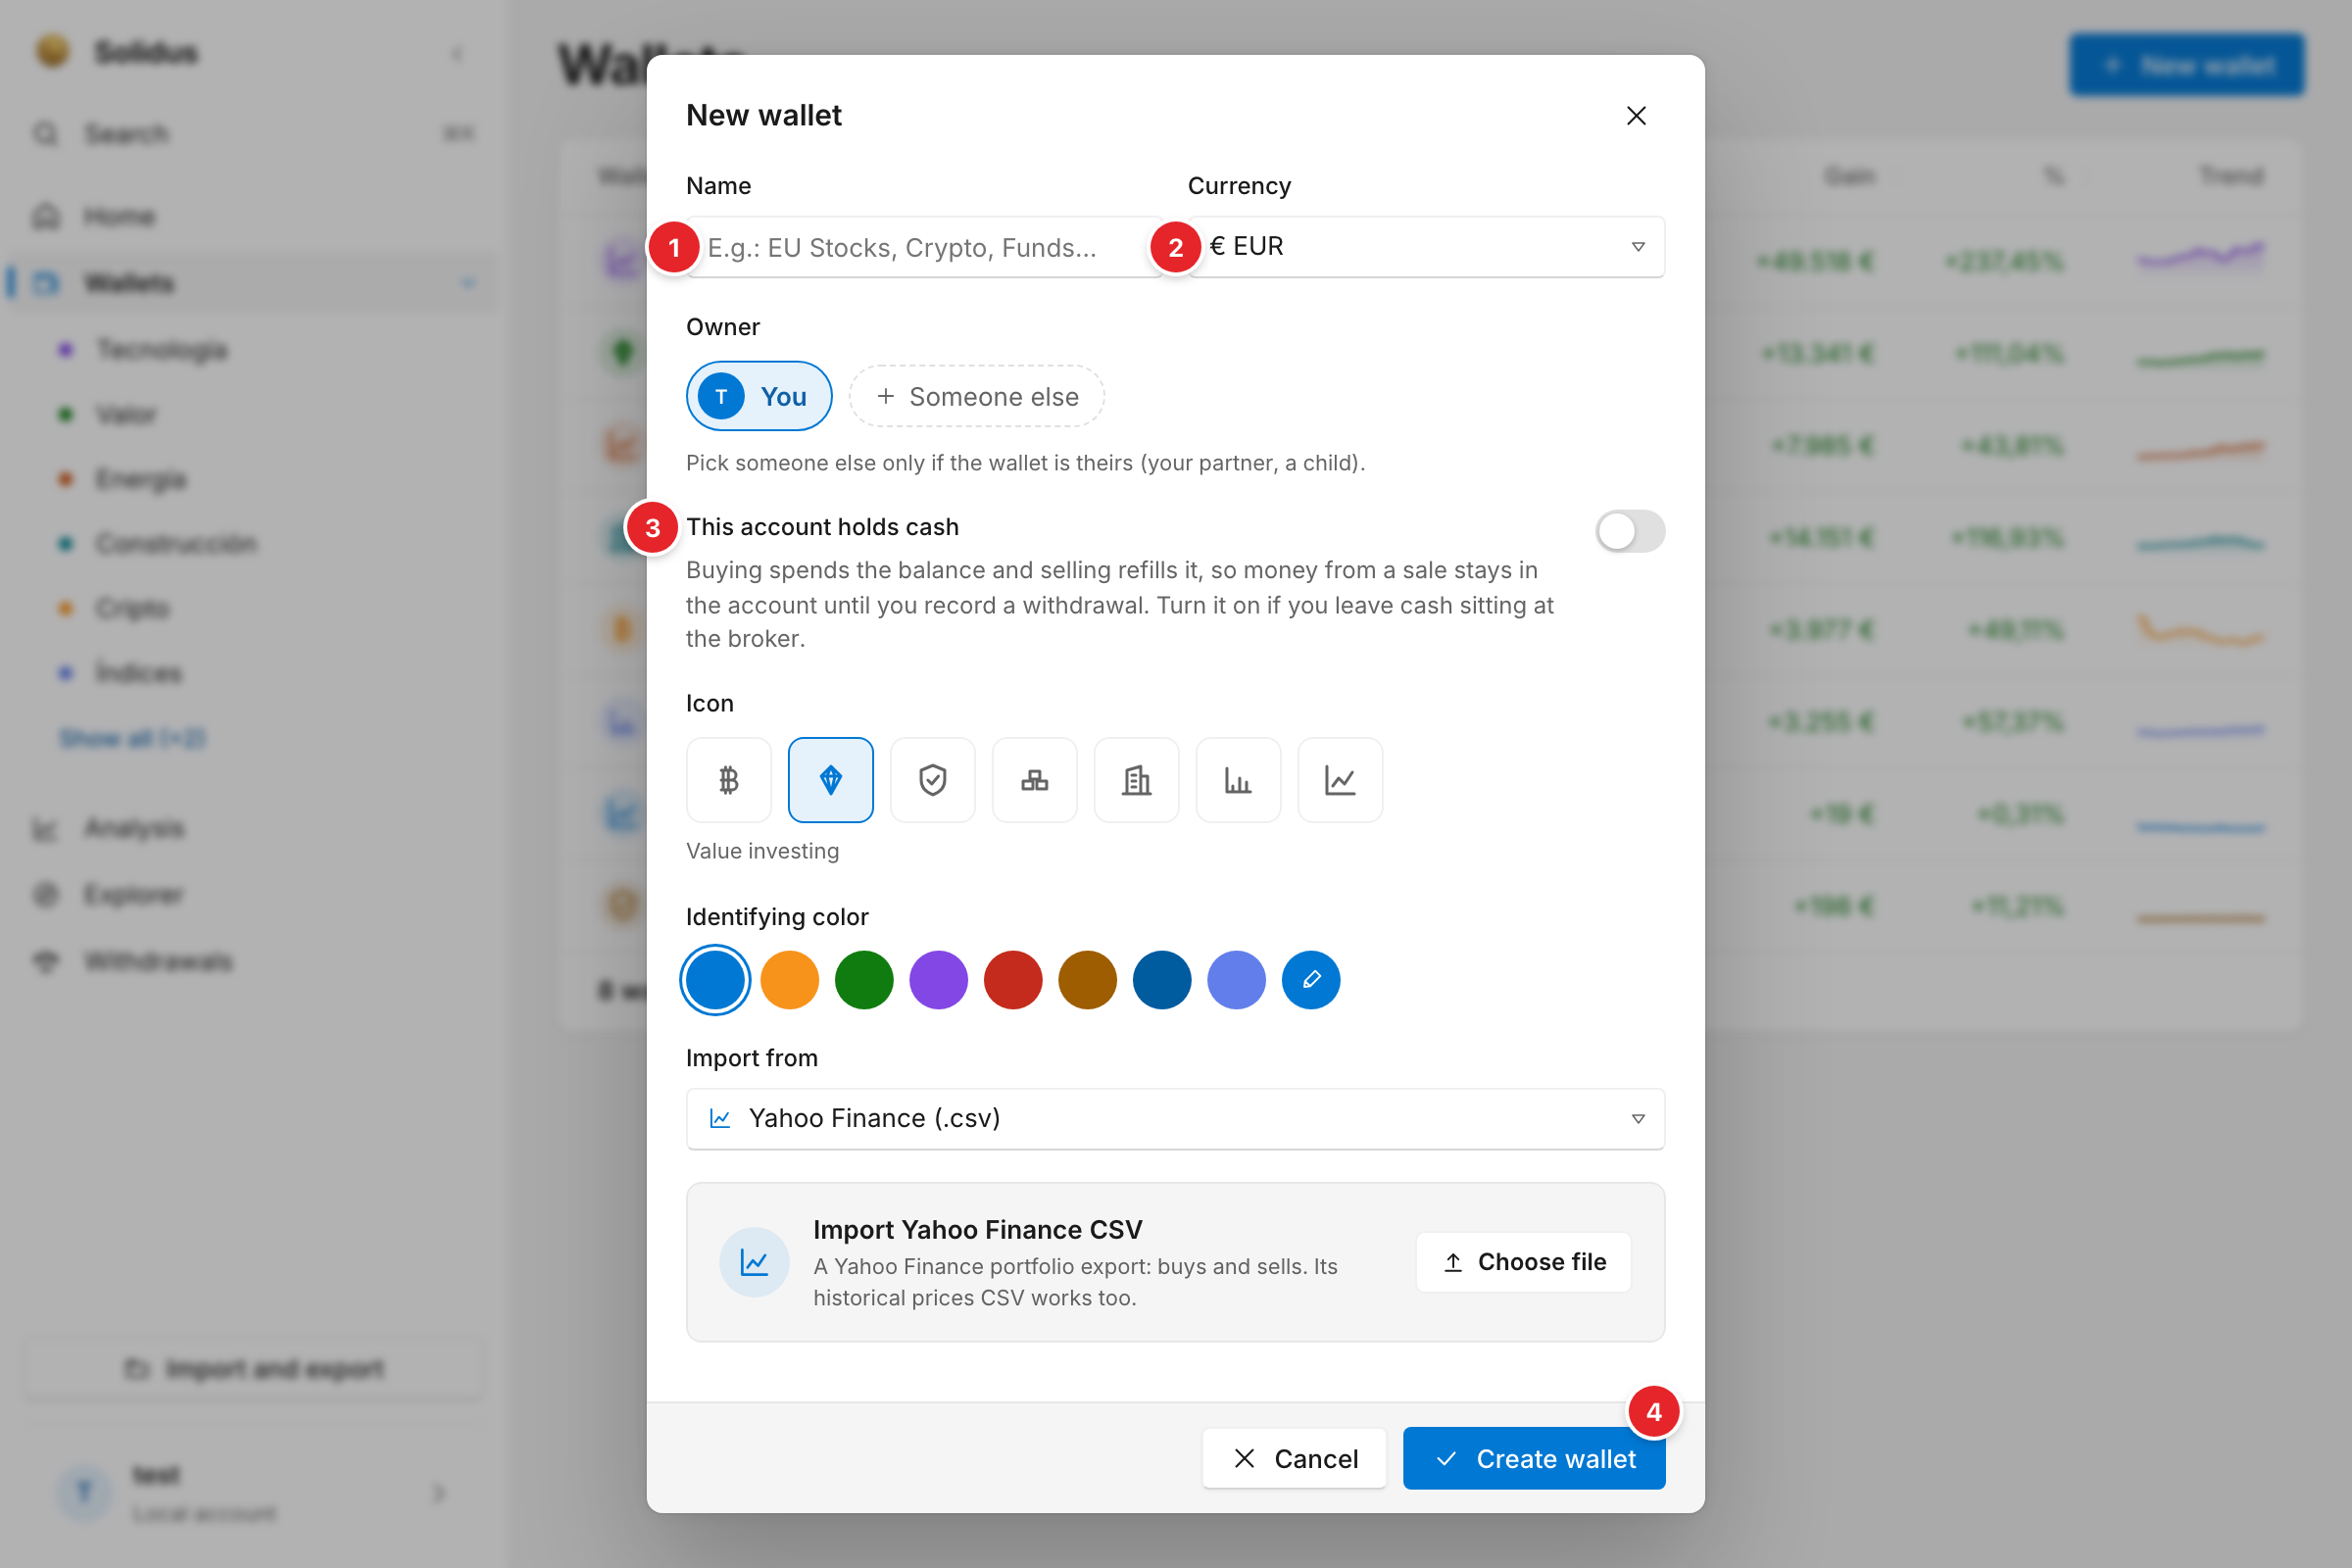
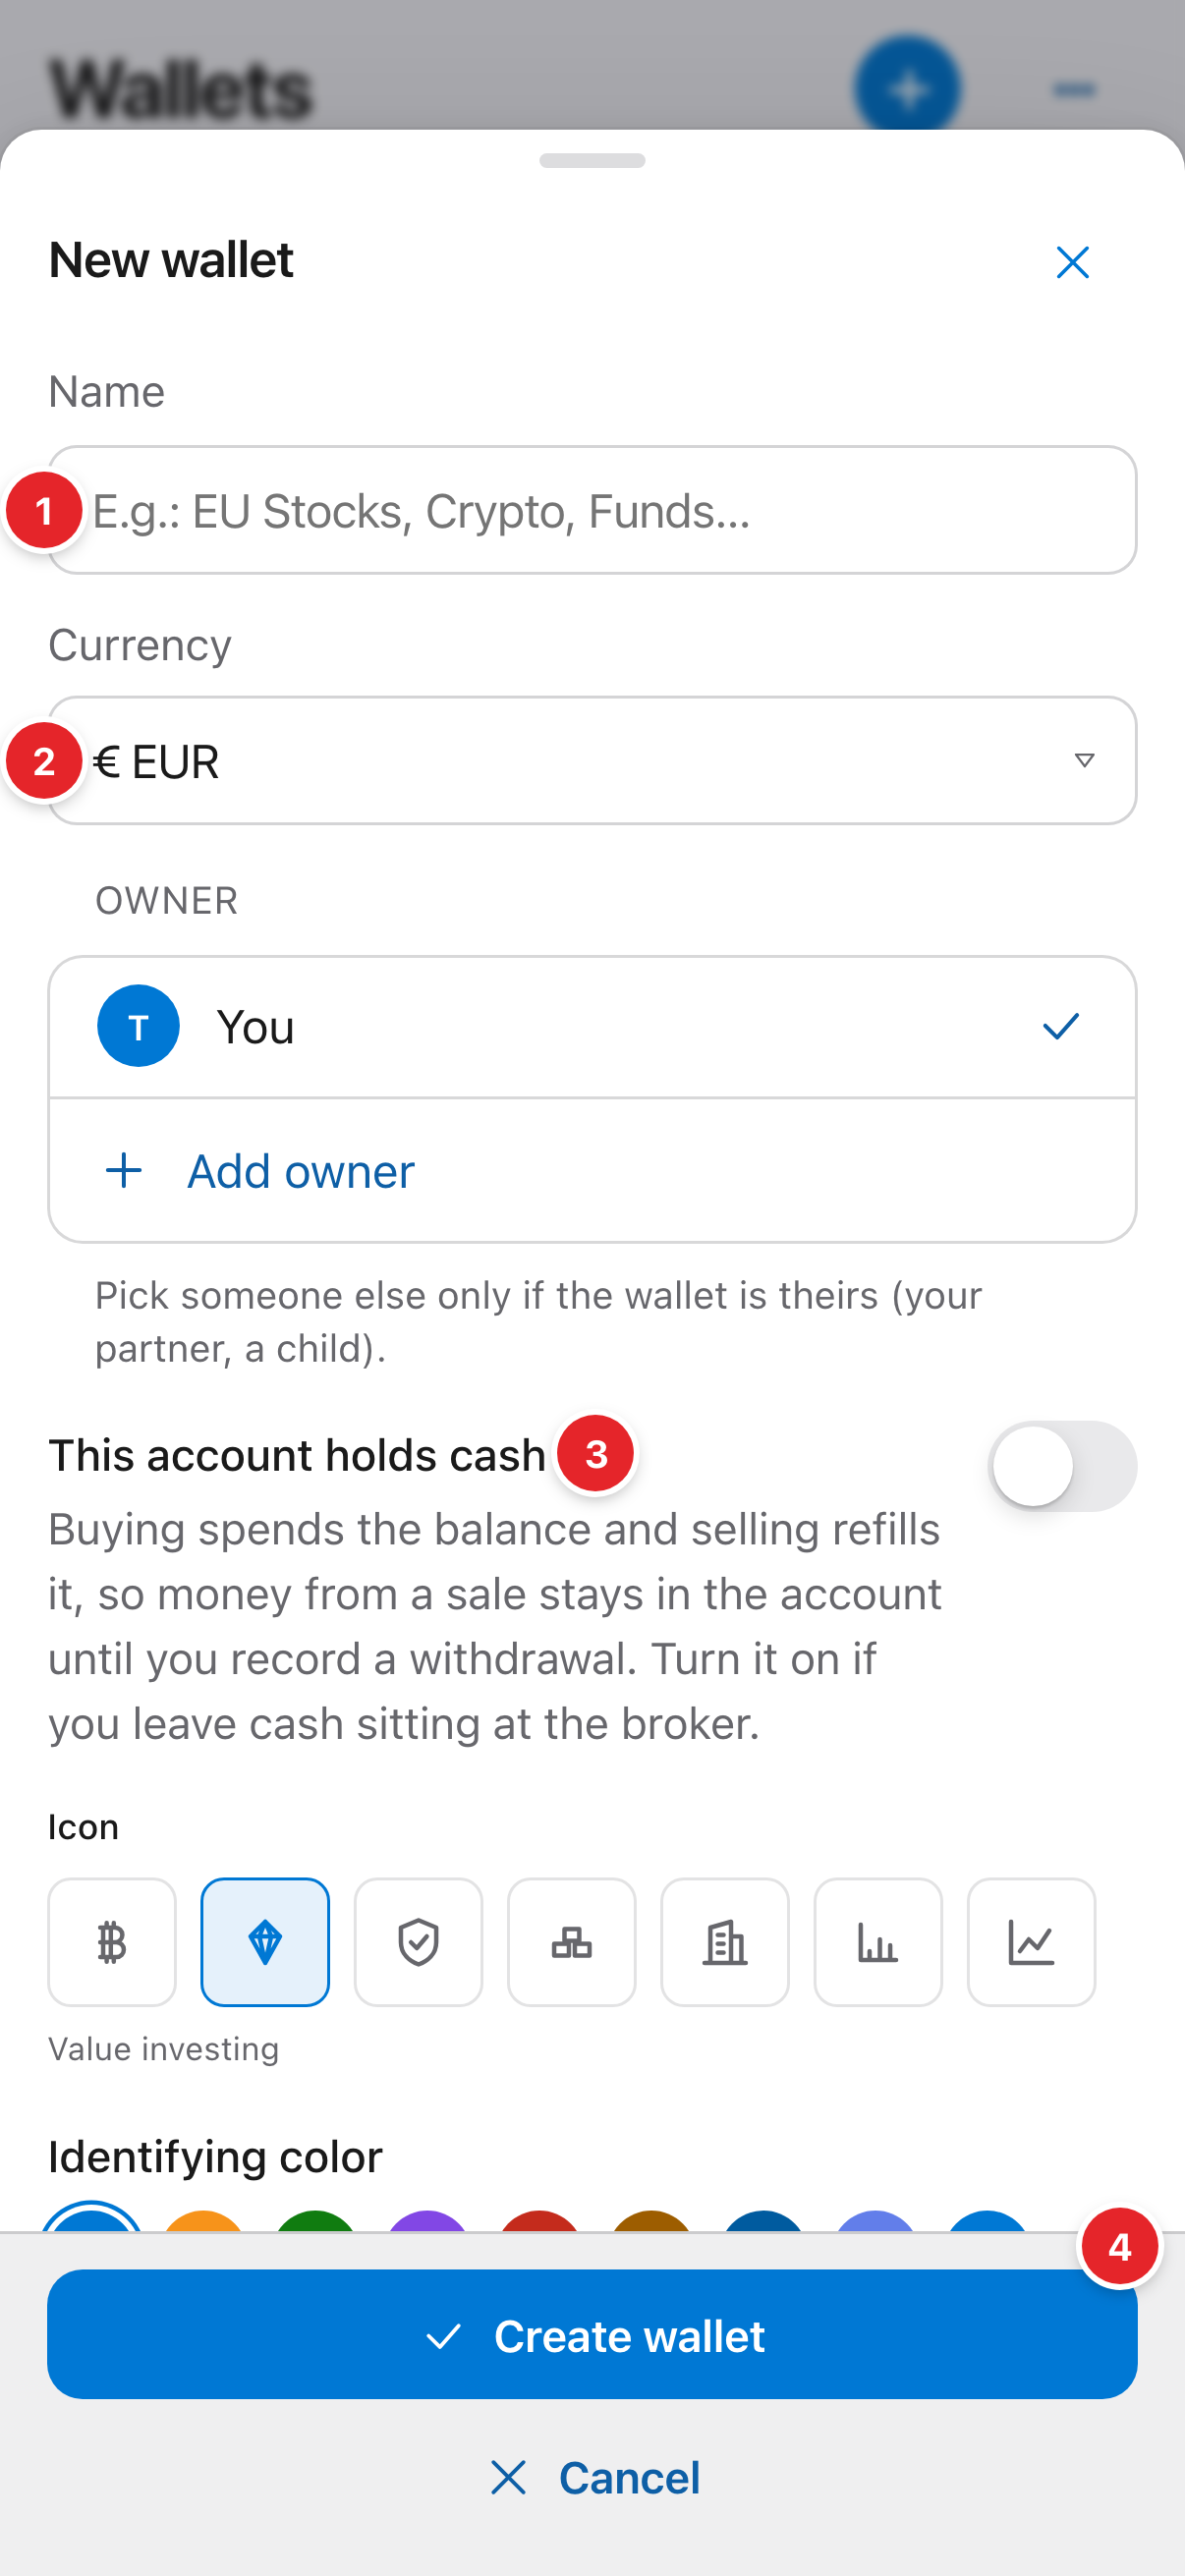
- The name. The only required field.
- The wallet’s currency (euro, dollar or pound).
- “This account holds cash”: turn it on only if your broker keeps an uninvested balance.
- “Create wallet”: saves and opens the empty wallet, ready for its first transaction.
3Add your first transaction
A new wallet is empty. The next step is recording what you bought: see Adding transactions.
Screenshots are of the real app with sample data, not anyone’s own.
Common problems
I picked the wrong currency, can I change it?
Open the wallet and use “Edit wallet”. Note that transactions are stored in the wallet’s currency; if you already have purchases, only change it if those amounts were really in that currency.
Is there a limit on wallets?
The free plan includes a limited number; paid plans raise it. You will see it when creating a new one.